The Automatypewriter is a typewriter that can type by itself:
It can also detect what’s being typed on it. It can be used to send text to and/or receive text from a computer via USB. It was designed as a platform for playing interactive fiction games, in particular to play custom software being developed for it by Jim Munroe.
How does it work?
As always, I hope to one day flesh this explanation out more, but since this is a work in progress, this will have to do for now. One important note, of which I am (unduly) proud: no permanent modifications have been made to the typewriter. This might be important if, in the future, I use a typewriter that I care about better preserving.
Making it type
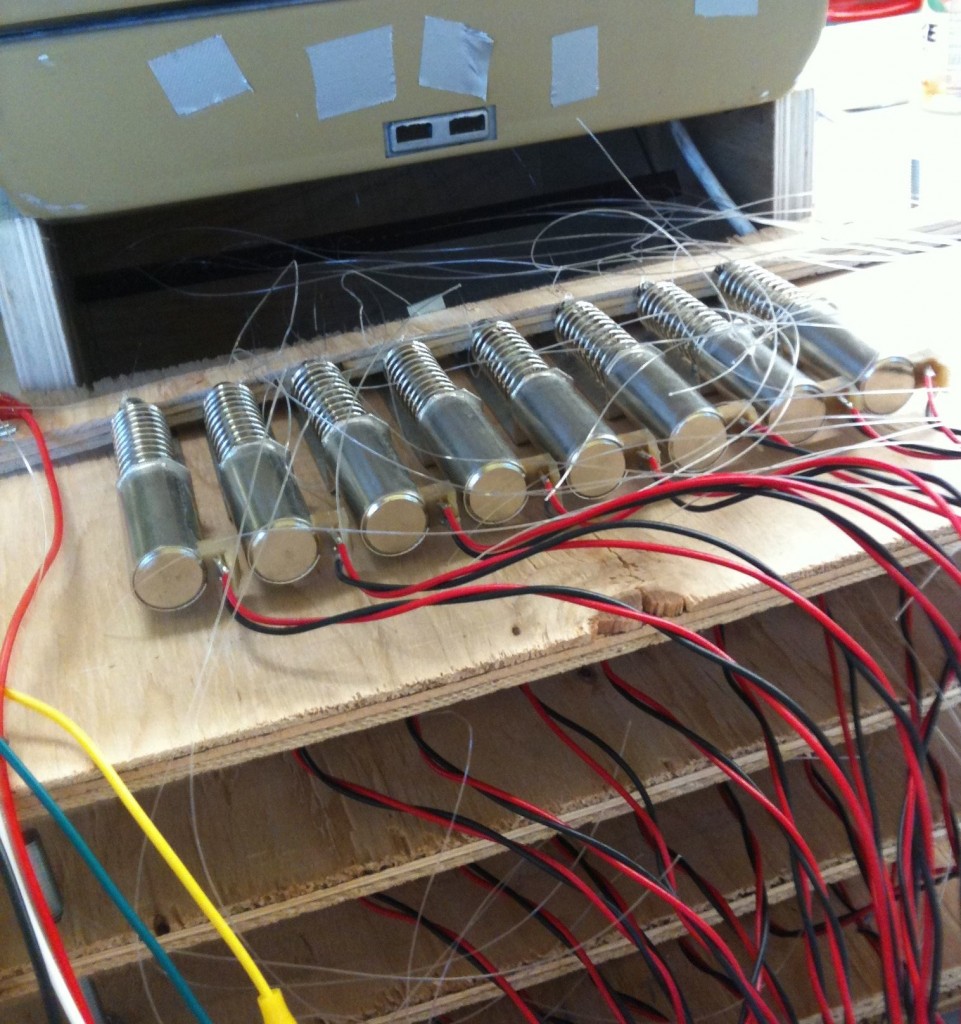
Each key is attached by fishing line to a solenoid, an electromechanical device that pulls down when electric current is passed through it. The solenoids sit behind and underneath the typewriter in a multi-layer structure. The solenoids are connected to a MOSFET, which allows the lower-power parts of the circuit to control the high-power solenoids.
The MOSFETs are connected in sets of eight to shift registers (integrated circuits that can, amongst other things, expand the number of outputs on a microcontroller). The shift registers are connected to an Arduino, which is connected to a computer via USB. When the computer sends a character to the Arduino, the Arduino chooses which solenoid to fire and sends that information to the shift registers.
So, in summary: computer to Arduino (via USB); Arduino to shift registers; shift registers to MOSFETs; MOSFETs to solenoids; solenoids to keys.
Detecting typing
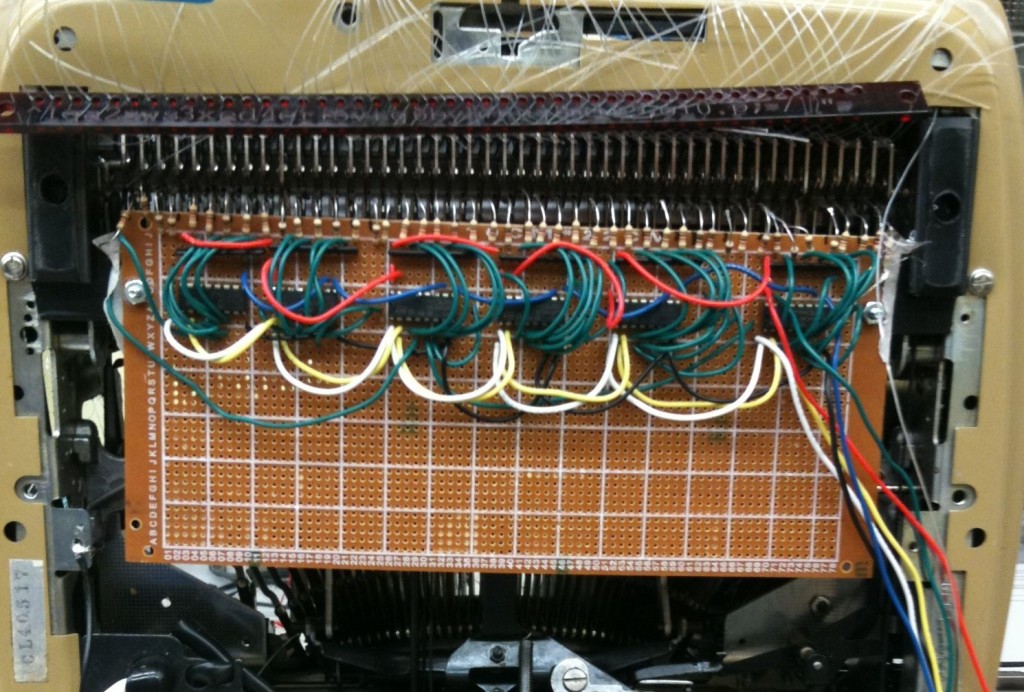
Detecting when a key is pressed uses a method very similar to that used by the USB Typewriter: a series of flattened resistors are placed such that when a typewriter key is pressed, the mechanism makes contact.

The belly of the beast, showing the detection circuit. Also visible: the laser-cut fishing-line sorter
The mechanism has been grounded to our electrical circuit to enable detection. Shift registers are used again here, this to to expand the number of inputs rather than the outputs. When the Arduino detects a contact, it sends the appropriate character to the computer via USB. It’s acting as a serial device, though, not a keyboard (i.e. you can’t use it to type in a normal program in this configuration).
Structural elements
Right now, all of the structure has been built from plywood and threaded rod, with the generous assistance of Dana Sarafinchan. (Assistance is an understatement: he did almost all of it.) Dana and I are working on designs to make the whole thing more robust and easier to assemble and maintain; currently, the assembly process takes several hours, and if anything goes wrong the entire thing needs to be taken apart. One element that makes things a bit easier is a laser-cut piece of acrylic to keep the lines from getting tangled, conveniently etched with the corresponding letter for each line.
Software
The Arduino software is fairly simple, as explained above: mostly it handles translating characters to solenoid numbers, and keypress numbers to characters. The one other thing it does is some timing to make sure the typewriter doesn’t jam, and also to make the rhythm of typing appear less mechanical and more realistic.
On the computer side of things, I’ve written a small Python script to handle serial communication to and from the Arduino. The script talks to Rezrov, an interactive fiction interpreter written in Perl by Michael Edmonson. I’ve slightly hacked the source code to format the output the way I want it.
Schematics
Because they were requested, I’ve started drawing up schematics for the circuit boards, and I’ll post them and update them here as they become available. Since I didn’t actually use these schematics when building it, I can’t guarantee that they’re perfect, so use at your own risk!
Each layer of eight solenoids is controlled by one of these boards. The boards are daisy-chained such that the serial in of the first 74HC595 (pin 14) is connected to the Arduino, and the serial in of each subsequent 595 is attached to the previous chips’ serial out (pin 9).


[…] Ein geniales Stück Steampunk: Mit dieser alten elektrischen Schreibmaschine kann man — dank Arduino — Zork (und in Zukunft auch andere Text-Abenteuer) spielen. Mehr Retro geht nicht. [BoingBoing] […]
[…] This post was mentioned on Twitter by alecf, Kate Sigrist. Kate Sigrist said: Immense – this is how I want to play IF games forevermore: automatypewriter http://bit.ly/bIMtxV […]
[…] Jonathan M. Guberman hat eine Schreibmaschine so gehackt, dass sie Text ausgeben kann (ach!) aus ein…(what?). Und darauf spielt Guberman im obigen Video eine Runde Zork. The Automatypewriter is a typewriter that can type by itself. It can also detect what’s being typed on it. It can be used to send text to and/or receive text from a computer via USB. It was designed as a platform for playing interactive fiction games, in particular to play custom software being developed for it by Jim Munroe. […]
[…] solches Textadventure kann man auch auf dem Automatypewriter spielen. Die Schreibmaschine schreibt von selbst die Geschichte auf. Basierend auf den Eingaben […]
[…] More on the Automatypewriter project can be found here. […]
[…] fiction leaps forward into the 21st century thanks to Canadian tinkerer Jonathan Guberman. Expanding on some of the ideas behind the USB Typewriter project, he has built into a venerable […]
[…] now, in the 21st century, we have arrived. The Automatypewriter can type by itself, can recognise what’s being typed on it, and can be used as a platform for […]
[…] some definition, a machine is good if you can play Zork with it. Here is a classic typewriter which is controlled by a piece of Arduino software and yes, you can play […]
[…] Automatypewriter is a project by Jonathan Guberman of Site 3 coLaboratory hackerspace in Toronto that features an Arduino controlled typewriter that can type on its own as well as detect what is being typed on it. Here’s a demo of the Automatypewriter playing the classic text aventure game Zork. […]
[…] Fans of the classic Infocom games (Zork et al) may appreciate the efforts of Jonathan M. Guberman and his Automatypewriter. […]
[…] for many the fact that this typewriter plays Zork on paper instead of a CRT is the fascinating part of this hack. But we love the implementation that […]
[…] Automatypewriter, Arduino typewriter that plays interactive fiction games via Waxy. It can also detect what’s being typed on it. It can be used to send text to and/or receive text from a computer via USB. It was designed as a platform for playing interactive fiction games, in particular to play custom software being developed for it by Jim Munroe. Filed under: arduino — by adafruit, posted November 1, 2010 at 4:50 pm Comments (0) […]